This plant, popular in indoor floriculture, from the Gesneriev family has two names: gloxinia and synningia.
These flowers are quite easy to care for and reproduce easily.
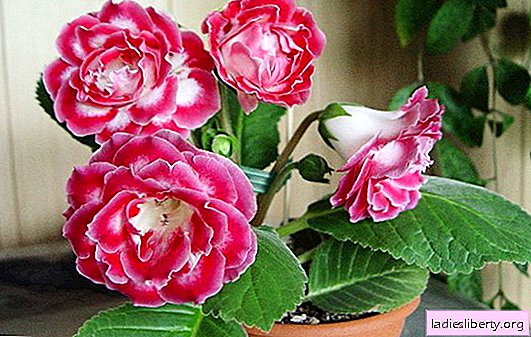
Breeders have bred many varieties that differ in the shape and color of the flowers (simple, terry, one-color, chintz, two-color, tiger), the size of the outlet (standard, compact, miniature).
In order for bright “gramophone” to please its beauty as long as possible, it is important to observe the “life cycle” of gloxinia: active vegetation and dormancy.
Gloxinia: home care - reproduction, dormancy, storage. Common breeding errors
At home, gloxinia is propagated in several ways: seeds, tuber division, stepsons, cuttings, peduncles. Since most varieties of gloxinia were obtained by complex hybridization, vegetative methods are used to preserve varietal traits in new plants during propagation.
The simplest and most affordable of them is rooting leaflets. They are cut off during the budding of the uterine plant. Cuttings can be rooted both in boiled water and in a substrate of sand (perlite) and peat (4: 1). If the stalk "sat" in the water, then after the appearance of the roots it is planted in a glass with soil or in a peat tablet. In both cases, to maintain increased humidity, at which rooting is faster, put the cuttings in a greenhouse or cover with a bag. After the formation of new leaves and nodules at the base of the mother sheet, the packets are removed.
If only one leaf of the treasured gloxinia is available, then to reduce the risk of unsuccessful rooting of the leaf, it can be divided into parts. With a disinfected scalpel or blade, cuts are made on the veins of the leaf, put it with the bottom side on the substrate, pressed a little and put in a greenhouse. At a temperature of + 20-25ºС and high humidity, new small sockets are formed along the edges of the cuts.

Several new plants can be obtained from one leaf gloxinia.
The same method can be done in a slightly different way: the central vein is removed from the leaf, the resulting 2 leaf halves are cut into parts between the lateral veins. One leaf blade can be divided into 12-15 such pieces. In the moistened soil from perlite and peat, the obtained cuttings are planted to a depth of not more than 1 cm, the soil around them is slightly crushed. A bowl with cuttings is placed in a greenhouse (under a jar or bag). Rooting occurs within 2 weeks. Next, young outlets are seated in separate cups. Care for them is the same as for adult plants.

Propagation by leaf fragments
Just like leafy cuttings, the crown of the gloxinia can be rooted. If you cut off the "top" of the plant, then side shoots will grow from the sinuses of the remaining lower leaves - stepsons. They are cut and rooted in the same way as leaf cuttings.
Gloxinia and peduncles propagated. After the flower fades, the peduncle is cut off, the dried “gramophone” is removed, the cut is dried and placed in water to a depth of 1 cm. It is convenient to use medicine vials for this. To prevent rotting, a tablet of activated carbon is dissolved in water. Rooting occurs on average after 3-4 weeks. Then the peduncle is planted in a glass with a moistened substrate, cover with a jar or bag. Further care is carried out as usual.
Tuber division - The most risky way, since there is a high probability of decay. For this procedure, it is important to choose a healthy tuber (resilient and without putrefactive stains) the size of an average potato (about 6 cm in diameter).
• Cut the tuber into pieces with a disinfected knife so that each of them has at least one sprout.
• Slices are dried, treated with brilliant green or powdered with crushed charcoal.
• Prepared delenki planted in moist soil. With subsequent care, it is important not to fill the tubers: in order to reduce the ingress of moisture on them from above, it is better to water them through a tray or using a syringe.
• After the roots appear around the entire earthen lump, the plants are transplanted.
Seed way the most time consuming. You can buy seeds in specialized stores or collect your own, after pollinating flowers. The sowing process is as follows:
• Prepare soil from peat and sand or perlite.
• Gloxinia seeds are quite small, so they are mixed with sand and scattered on the surface of the soil. You do not need to fill them on top. (Purchased seeds are already granulated for convenience).
• Crops are watered by spraying water from a spray bottle.
• Cover the planting bowl with glass or cling film and set for germination in a warm (+ 23ºС) bright place. Periodically seedlings aerate and moisturize.
• Shoots appear after 14-20 days.
• After the growth of these leaves, the seedlings are dived into separate pots or plastic cups (it is easy to observe the development of the root system in them).
• Young plants begin to bloom after 7-8 months of vegetation. It is better to pinch off the first buds so that the plant has enough strength for the development of the outlet.
Common Gloxinia Reproduction Errors
A common problem when gloxinia reproduces at home is rotting of planting material. This occurs for the following reasons:
1. It is impossible to forcefully push the stem into the ground when planting. It is better to make a recess in the soil with a finger or a stick, insert a stalk and slightly squeeze the earth around it.
2. Lack of light. Move the rooted plant to a lighter place or use additional illumination.
3. Overheating. Direct sunlight falling on the greenhouse with plants, coupled with high humidity contribute to rapid decay.
4. When cutting the cuttings and dividing the tuber, the instruments were poorly disinfected and microbes got into the wounds.
5. For rooting, old leaflets or diseased tubers were selected.
6. Waterlogging and low air temperature
Rest period
To gloxinia bloomed the next year, it must be sent into hibernation to gain strength. To do this, after the last flowering in the current year, watering is reduced and minimized (the soil should only be moist). Gradually, the ground part will begin to dry out. It is cut off, leaving a 2 cm stump. The plant prepared in this way is ready for the rest period.
How to store gloxinia tubers
Tubers at rest are stored in several ways:
1. Do not remove the tuber from the pot, cover it with sand above, store in a cool (+ 10-12 ° C) dark place. Do not water.
2. Pull the tubers out of the pot, peel off the soil, lay in shallow containers, cover with calcined sand. Store on the bottom shelf in the refrigerator.
3. Leave the pots with tubers in a cool dark place (on the balcony or under the bath), moisten the soil a little 1-2 times a month.
Gloxinia home care - soil, lighting, temperature and humidity, flowering conditions
The soil
Gloxinia grows well on fertile and loose soils. In garden shops special soil mixes such as Violet, Senpolia are sold. With independent production of soil, mixed sheet, sod ground, humus, sand (2: 1: 1: 1) is mixed. To prevent stagnation of moisture in the soil in pots, drainage is required (expanded clay, crushed polystyrene).
Temperature and humidity
Gloxinia is thermophilic. The favorable temperature during the day will be + 20-22 ° C, at night + 18 ° C. The hibernation period should occur at + 10-14ºС. During the growing season of gloxinia, increased air humidity is needed. At the same time, moisture should not be allowed on leaves and flowers. To keep the air moist, pots with plants are placed in a pan with wet pebbles or expanded clay.
Lighting
For gloxinia, bright diffused light is preferred. From February to April, plants can be placed in direct sunlight. In other seasons, the western or eastern window sills will be the best place. If the windows face south, then the gloxinia pots are placed away from the glass or shaded with paper, gauze, tulle.
Flowering conditions
With proper care gloxinia blooms from spring to early fall. If she is “on strike” and refuses to please you with her bright “phonographs”, this may be for the following reasons:
• Plant age: the older gloxinia, the less it blooms;
• Excess or lack of fertilizer;
• Pests and diseases;
• Unsuitable pot size - in a large capacity, the plant will grow tuber to the detriment of flowering;
• Inadequate lighting in dry air;
• Lack of rest period;
• Improper care after flowering.
In order to stimulate the plant to re-bloom in the season, the stem is cut off after flowering, leaving several pairs of lower leaves. Stepsons will grow from sinuses. Among them, only the most powerful should be left. To grow leaves, this period must be fed with fertilizers with a high nitrogen content. When buds appear, doses of phosphorus and potassium-containing preparations are increased. Repeated flowering will be less magnificent than the first.
Gloxinia home care - top dressing and watering
Watering
During the period of active growth, gloxinia is abundantly watered with settled water at room temperature. However, it is important to prevent overflow - gloxinia does not tolerate excess moisture due to its high susceptibility to fungal diseases and rot. During the dormant period, watering is reduced to a minimum or not moisturized at all (depending on the storage location).
Top dressing
Gloxinia is fed every week, starting from the end of the dormant period, from April to August. Fertilizers for this are used special for flowering houseplants (Bona forte series, Agricola, Good Strength, Fertika, Mr. Tsvet Senpolia, etc.) - they have less nitrogen and an increased dose of phosphorus and potassium. Fertilizers are applied only after watering, otherwise a burn of the roots is possible. Transplanted plants are fed only after 1-1.5 months after transplantation.
Gloxinia at home: why does it die?
When watering with cold water or an overdose of fertilizers, brown spots form on the leaves.
Grayish plaque on the leaves is characteristic of the defeat powdery mildew or gray rot.

Powdery mildew pour gloxinia
These fungal diseases develop with errors in care: excessive soil moisture, low air temperature. To combat them, the affected parts of the plant are removed, and he himself is treated with a systemic fungicide (for example, Topaz).
With development late blight at the gloxinia, the root collar rots, and brown, moist spots are characteristic on the leaves. A sick plant will have to be destroyed.
Of the pests, gloxinia is often affected by cyclamen and spider mites, thrips, and mealybug.
If the leaves thicken, the edges curl down, the pedicels are deformed, the buds fade, then this picture is characteristic of parasitization cyclamen tick. With large colonies on the underside of the leaves, they look like a layer of dust.
As a result of life spider mites small yellowish dots remain on the leaves, which then merge into extensive brownish spots. With the mass appearance of pests on the plant, you can see the cobweb. To control ticks, acaricides are used.
Also dangerous for gloxinia and thrips. Their presence is characterized by silver marks on the upper side of the leaves, which subsequently turn brown and dry. Fighting thrips is a must, but you can. For this, the plant and soil are treated several times with insecticides (Actellik, Aktara, Fitoverm).
The lack of growth gloxinia indicates the depletion of the soil, low air temperature during the growing season.
A sharp wilting of the leaves is a typical picture when the tuber rots in waterlogged soil.