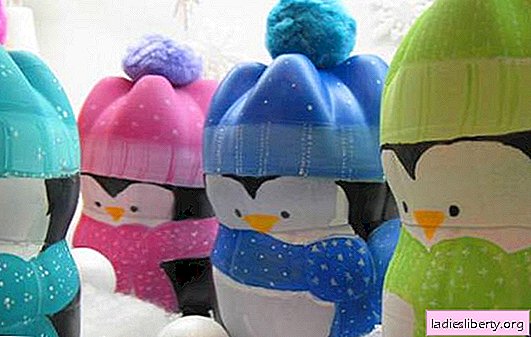
We throw out a lot of used plastic bottles with garbage, but in fact, how many of them can be made useful crafts. They are needed in order to bring water, to enclose the flower, and they can also be used to drive away the raven by putting some crushed stone inside, to create kitchen appliances or a broom for the foliage to fall.
Useful things you say, but what if the soul asks for beauty, but not so much money for it? Crafts from bottles will come to the rescue, which will gladly decorate any of your garden plots or apartments.
Today's master class on DIY plastic bottle crafts with useful tips and step-by-step instructions.
Crafts from Plastic Bottles for Beginners: Pink Pig

Piglet is not only a dirty creature, delving into no one knows where, but a flower pot that will make your bouquet even more beautiful. To create crafts from plastic bottles, you will need the following materials step by step:
- a five-liter plastic water bottle;
- 6 plastic bottles with a volume of 1.5 liters;
- inexpensive pink paint;
- paint brush;
- strong wire;
- beads for the eyes and nose of the piglet - 4 pcs. or purchased self-adhesive eyes.
Stage 1
In the beginning, we will prepare the necessary materials and put them on the table. Take 6 bottles and cut them off the neck, about 3-4 cm inward, since the base is practically not useful to us.

Stage 2
In a five-liter bottle, cut 4 holes at the bottom for the legs, 2 holes for the ears and make a small incision in the back of the future pig. Try to do it carefully so as not to create extra holes on the surface of the bottle.
Stage 3
Take 2 blanks that remain from the 1st point and divide them into two parts, after removing the neck itself. Give them the shape of the petals so that the workpiece looks like the ears of a pig.
Stage 4
Take the wire and bend it in the form of a pig tail. This blank must be inserted into an already prepared hole in the back of the piglet. 4 beads prepared previously must be fixed on the bottle cap in the form of a heel and in front, so that they look like small pig eyes.
Stage 5
Insert the piggy ears and legs that you prepared in advance. All parts of the body should hold tight to the base of the piglet and not fall off.
Stage 6
When everything is ready, the body of the piglet can be coated with pink or any other color. Paint your eyes white or black for greater expressiveness.
Craft from plastic bottles: a step-by-step workshop with a cheerful snowman

Winter is the time when you want magic and celebration. Having gone to your summer cottage, you can make a snowman there, which will last a maximum of a week, or you can make it in the form of crafts from plastic bottles with your own hands and it will not melt, even if it rains.
To create a snowman you will need:
- threads, twine and wire for the base of the snowman;
- the bottom of the plastic bottles, their number depends on the size of the snowman;
- large buttons or thick black cardboard for the eyes;
- soft colored cardboard for the nose;
- scarves, a bucket or a hat to complete the look.
Stage 1
With the help of wire and twine, we make two balls of different sizes, which will serve as the skeleton or base for the snowman. Fasten two balls together, placing them vertically one on top of the other. A smaller ball is mounted on top of a large ball.
Stage 2
Count the right number of plastic bottles and cut off their base. Make two opposite holes on the sides of each base using an awl heated on a fire. In order for the craft to look like a real snowman, paint each cut bottom with white paint.
Stage 3
A thread is inserted into the hole made, which passes through each hole in the bottom cut off from the bottle. It looks as if the beads are strung on a thread, only instead of the beads the bottoms of plastic bottles.

Wrap them around the wire frame, starting from the top point, gradually going down. In places, fix the rows on the frame with thread or wire so that they do not lead, and the snowman does not warp. Position the bottoms so that there is minimal clearance between them when attaching. In the future, the wire will hold the bottoms of the bottles, and the twine will not allow the structure to fall apart.
Stage 4
Glue the eyes on the smaller ball and make the snowman smile, and fasten the buttons on the big ball in three rows. Make a nose for a snowman out of a piece of colored cardboard. Choose a color, traditionally it is orange and twist a sheet of cardboard with a funnel. Glue a cardboard “carrot” in the middle of the face.
Stage 5
Put a scarf on the snowman, and put some nice hat or plastic bucket on top.
DIY Plastic Bottle Crafts: Caterpillar on Wheels

Children are very restless, and sometimes even hyperactive. Make your baby happy by making him such a simple but interesting toy like a caterpillar. She will have a leash and wheels, so your child will be able to roll and pull her along.
Prepare the necessary materials:
- 10 plastic bottles with a volume of 0.5-1 liter;
- a metal tube of 5 pieces;
- high-quality water-resistant paint of various colors;
- plastic covers of different sizes 50/50;
- beads, twine and some wire.
Stage 1
To get started, take the bottles and cut the bottom off them. Then make a hole in the middle with a hot needle or awl. After completing the preparations, fasten the two bases by fitting them on top of each other. Slightly fuse the resulting joint with a heated knife. After the bases have dried, they can be painted in various colors so that the caterpillar turns out to be as bright as possible. Wait for the paint to dry.
Stage 2
In fact, the same thing needs to be done with covers. Make holes in them and join together to make them look like a wheel.
Stage 3
Prepare a metal tube and insert it through the bottom of the base of the bottles, as well as through the holes in the lids. Thus, you will get several parts of the caterpillar.
Stage 4
The finished parts of the caterpillar are connected using a rope threaded through. Leave a small distance between the parts so that the caterpillar can turn its body and bend.
Stage 5
Combining everything together, you can begin to create the face of the caterpillar. Bring life to it will help you fixed on the face eyes and antennas on the top of the head. To do this, take the buttons and glue them to the upper part of the face so that its middle looks like a nose.
Two holes are made above the eyes. Two wires are inserted into them, on which two more buttons are attached so that the child does not get hurt.
Stage 6
Beads or other smooth objects are put on all sharp areas, so that the child could not injure himself while playing with the caterpillar. Leave the craft to dry for several hours so that all the parts can finally fix. You can also decorate the caterpillar with a ladybug or other plastic insect at your discretion.

