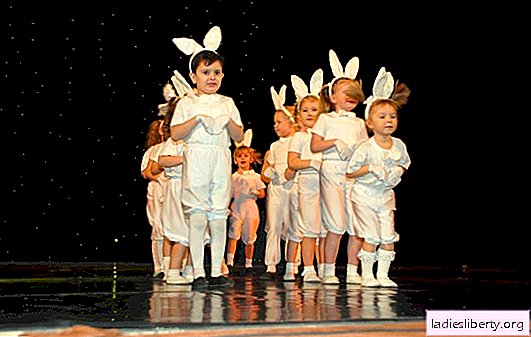
Ever since Soviet times, boys dressed up in each bunny costume were dressed in a bunny costume. This fabulous character is involved in modern productions. The process of making a costume "Hare" for the boy with his own hands is simple. To sew it, you will need a suitable fabric, pattern and a few simple instructions.
What to sew a bunny costume
For tailoring, it is better to choose a soft fabric: fleece, velvet, plush or velor. Fabric colors can be from white to blue. In addition, you will need a piece of satin fabric and fur to decorate the ears of a bunny and make a tail.

You can speed up the process a bit and take white thermal underwear or terry pajamas as the basis. This will not only save time, but also money, because decorating a finished suit is much easier. Everything you need can be found in any store.
The process of sewing a do-it-yourself costume "Bunny" for a boy
First draw a sketch of your costume from the hat to the tail. For boys of the younger group, it is better to make jumpsuits and a hat, but older children can sew bunny ears on the rim.
How to make rabbit ears on a rim
Materials for work:
• fabric for the ears: plush, velor or fur;
• satin or pink satin;
• hair band;
• thin wire;
• threads, glue and scissors.

Working process
1. We prepare a pattern of ears. To do this, draw an eye on cardboard about 30 cm long and 10 cm wide. Narrow the pattern down to 5-7 cm, and make a rounding at the top. We cut out the details from paper and transfer it to the fabric.
2. From the soft, dense fabric, we cut out four parts for the base of the ears. From the satin fabric we cut out two smaller pieces. We will decorate the inside of the ears for our bunny.
3. Sew or glue the inside of the pink satin to the base of the ears, iron the seams.
4. We connect the details of the ears from the main fabric with the sides inward and sew on the machine.
5. Turn out and iron the workpiece.
6. We measure the wire of the required size and insert it along the edge of the ears. Due to this, they can be bent to the desired position.
7. Having departed from the edge of 1 cm, we lay a line, fixing the wire inside the ears.
8. The lower section of the ears is tucked on the wrong side by 1 cm.
9. A bezel is threaded through the received holes, and the ears are fixed with hand-held blind stitches.

Advice! The rim can be decorated with the same fabric from which the ears themselves were sewn. A strip of fabric is wrapped around the rim, fixing with glue.
Bunny hat with ears
Materials:
• fabric for hats and ears;
• satin or satin fabric for the inside of the ears;
• wire;
• elastic gum.

Working process
1. To sew a hat, first you need to make a pattern of the right size.
2. Take a measurement of the circumference of the child’s head.
3. The cap will consist of four wedges. The bottom of the wedge is calculated by the formula: measurement of exhaust gas + 1cm: 4 = AB.
4. We draw sections AB, we find its middle. Up from the middle we lay the perpendicular equal to the length AB.
5. We connect the top and bottom of the wedge with a smooth curve.
According to this pattern, we procure four parts, not forgetting about allowances for seams of about 1.5 cm. Next, using the above technique, we make ears for a hare without a rim. Putting a hat:
• fold the wedges with their sides inward, pin them off with pins;
• put ears in opposite seams, sweep parts;
• we wedge the wedges on a typewriter, twist and remove the basting.
Sew a strip of main fabric to the bottom of the product. The length of the strip is equal to the OG of the child, and the width is 3-5 cm. We fold the strip in half and sew to the lower cut of the cap. We turn the finished product on the front side, sew elastic elastic on the sides so that the hat remains in place during the performance.
Sewing overalls for the suit "Hare" on the boy with his own hands
For small artists, a suit in the form of overalls is much more convenient and practical. Sewing it is quite simple, you just need to take the necessary measurements.
1. The length of the finished product from shoulder to floor.
2. The waist circumference of the child.
3. The length of the arms and legs.
4. The width of the back.
Advice! In order for the suit to sit freely and not hamper movement, you need to make an increase in the freedom of fitting about 10 cm.

Working process
1. Two parts of the front, a detail of the back, and sleeves are cut from the main fabric.
2. Smooth all the workpieces and process the seams on the overlock or “zigzag” seam.
3. Fold the front and back parts with the front sides inward, cleave.
4. We sew shoulder, step and side seams.
5. Turn the jumpsuit onto the face, sew the zipper into the front seam.
6. Sew the sleeves, smooth the seams.
7. Turn the overalls inside out, and the details of the sleeve on the front side.
8. Insert the sleeves into the armholes with the front side to the front side of the overalls. We fasten the product with pins and sew along the okat.
9. Tuck the bottom of the sleeves and sew on a typewriter.
10. Tighten the bottom of the legs and sew, insert the elastic.
11. Turn the neckline with an oblique trim.
Turn the finished suit on to the front side and decorate.
How to sew a bunny tail with your own hands
Materials for work:
• fabric matching the costume or fur;
• cotton wool or synthetic winterizer for stuffing;
• threads, scissors.
On thick cardboard, draw a circle of the desired length, transfer the pattern to the fabric. Cut one piece from the main fabric.
On the edge of the workpiece we lay a stitch, tighten the part. We stuff the tail with cotton or synthetic winterizer. Sew the tail to the bunny costume with secret stitches.

DIY bunny carnival costume for the boy is ready!
How to make a bunny costume from white pajamas
Beginners can take ready-made clothes as the basis of the New Year's costume:
• shorts, a t-shirt and a vest;
• white thermal underwear;
• plush pajamas.
Decorate your finished clothes easier and faster. We prepare ears for the bunny according to the above scheme in the form of a hat or on the rim.
How to make a tummy and legs for a bunny
Materials for work:
• a piece of pink felt;
• white fabric for ponytails and paws;
• glue, scissors, threads in tone.
Working process
1. Choose a plate according to the size of the baby’s tummy, circle it on thick paper. Pattern is ready!
2. From pink felt we cut out the blank of the future "belly".
3. Glue or sew the blank on the clothes with a machine seam "zigzag".

4. We prepare and sew a white tail to the shorts.
5. For sewing gloves, paws will need a white cloth and pink felt. On paper we draw a pattern of mittens and transfer it to the fabric.

6. Four parts are cut out of white fabric, pink blanks are made for pillows.
7. Pull off gloves and sew on a typewriter. We turn out the details.
8. Glue pink felt parts onto the inside of the legs.
9. Turn the upper section of the gloves and insert the elastic.

Unusual and simple bunny costume for the boy with his own hands is ready!
Think in advance all the details of the costume, so that during the work you will not be distracted by trifles. You can complement the image of a bunny with makeup, plush carrots. A strict bunny costume for a boy, sewn with your own hands on the basis of ready-made clothes, can be decorated with a black bow-tie and Czechs.


